What Are Transparency Effects in Windows 11 and How Do They Work?
What Are Transparency Effects in Windows 11 and How Do They Work?
5 Answers
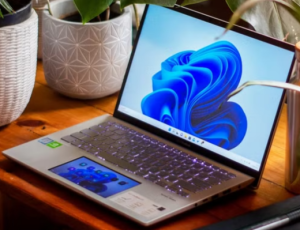
Transparency effects in Windows 11 are visual enhancements that create a semi-transparent, blurred appearance for interface elements like the taskbar, Start menu, and windows, improving aesthetic appeal and consistency across the operating system. These effects add depth, especially in dark themes, by allowing subtle background visibility, which enriches the immersive user experience.
Transparency is achieved through two primary materials:
Acrylic: Used for dynamic elements such as the Taskbar, Start menu, and flyouts (e.g., notifications and context menus), it generates a fluid, blurred translucency that responds to motion or background changes.
Mica: Applied to the backgrounds of active windows and other static surfaces, it provides a frosted-glass effect with a static blur, subtly revealing the underlying wallpaper or content for a layered, elegant look.
To manage these effects, users can toggle them on or off via the Settings app under Personalization > Colors, where a simple slider controls the transparency feature.
Transparency effects in Windows 11 are pretty cool—they make parts of the operating system like the Start menu, taskbar, windows, and notifications look semi-transparent. This adds a touch of depth and makes the interface look more contemporary and easy on the eyes. It’s not just about how it looks; it helps you prioritize what’s important without losing track of your background tasks.
Here’s a lowdown on how transparency effects work in Windows 11:
These effects are a part of Microsoft’s Fluent Design System that focuses a lot on fluidity and making things look good. The system uses your computer’s graphics power to create these semi-transparent layers, making everything run smoothly. Windows 11 has taken these effects up a notch with more refined animations and a dynamic response to what you do with your system.
There are a few ways to switch these effects on or off:
- Via the Settings App: Just hit the Windows key + I to open the Settings app. Go to Personalization, then Colors, and scroll to the bottom to find the Transparency effects switch.
- Via the Registry Editor: Press Windows + R, type regedit, and hit OK. Navigate to HKEY_CURRENT_USER\Software\Microsoft\Windows\CurrentVersion\Themes\Personalize. Create a DWORD value called EnableTransparency and set it to 0 to turn off transparency or 1 to turn it on. Be careful here—back up your system first since messing with the registry can be risky.
- Via Accessibility Settings: Open the Settings app, click Accessibility, and then Other options. Flip the switch next to Make everything on your screen bigger to turn off transparency effects.
- Via the Group Policy Editor: Press Windows + R, type gpedit.msc, and hit OK. Navigate to Computer Configuration > Administrative Templates > Windows Components > File Explorer. Find the relevant policy and configure it as needed.
You can tweak these effects to your liking:
- Adjusting Transparency Intensity: In the Settings app under Personalization > Colors, play with the transparency intensity slider to get the look you want.
- Customizing Accent Colors: Pick an accent color that looks good with your desktop background. This trick can make transparency effects pop or dial them down. Windows can also automatically select a theme color based on your background.
- Modifying Taskbar Transparency: For taskbar transparency, you can create a .reg file with specific content, save it, and then double-click the file to add settings to the registry. A restart might be needed to see the changes.
Here are some upsides and downsides:
- Pros:
- Enhanced Visual Appeal: Transparent windows look elegant and help declutter the interface.
- Improved Multitasking: You can see what’s behind your open windows, which is handy for multitasking.
- Focus on Content: Less used elements fade a bit into the background, letting you focus better on what you’re doing.
- Modern Aesthetic: The clean and organized look fits nicely with modern workspace vibes.
- Cons:
- Performance Impact: Older systems might struggle to keep up, which can slow things down.
- Readability Issues: Sometimes text and icons can be hard to read on a transparent background, especially if it’s busy.
- Compatibility Concerns: Some older apps or drivers might not support these effects well, causing glitches.
- Potential Distractions: Transparency can reduce clutter, but it might also introduce visual distractions for some folks.
Here’s where you’ll see these effects in action:
- Start Menu: Watch your wallpaper peek through the Start Menu—nice touch, right?
- Task Switcher and Virtual Desktops: Switching apps or using virtual desktops looks smoother and more cohesive.
- Context Menus and Notifications: Even the little things like context menus and notifications get a sleek and integrated look.
All in all, transparency effects really elevate the visual experience of Windows 11, making it look slick while also helping with multitasking. Just be mindful of your hardware’s capabilities and personalize it to fit your workflow. Who knows, we might soon see even more advanced transparency options that adapt to our individual needs and preferences!
Alright, so let’s dig into this: Transparency effects in Windows 11 are those cool visual tweaks that make parts of your screen slightly see-through. Whether you’re looking at the Start menu, the taskbar, or some of the app windows, this nifty feature lets a hint of what’s behind them shine through. It’s all part of Microsoft’s Fluent Design dream of a slicker, modern interface that’s not just easy on the eyes, but also gives things a bit of depth.
Here’s how it rolls—Windows uses a material called Mica to blur backgrounds so apps look a bit lighter and layered when they’re active. Move away from them and bam! They switch to solid colors for clarity without losing that touch of style. It’s a clever trick to give the interface some oomph without draining your performance or battery life.
Feeling like you want more control? No sweat, you can toggle these transparent wonders on or off. Here’s the scoop:
- Open Settings: Hit the Start button and tap that gear icon, or just punch
Win + I. - Navigate to Personalization: Head to “Personalization.” It’s your gateway to making the UI yours.
- Select Colors: Look over at the sidebar and hit up “Colors.”
- Adjust Transparency Effects: Scroll on down, find the switch for “Transparency effects,” and go to town.
And speaking of accessibility, there’s a backdoor for tweaking transparency:
- Dive into Settings.
- Pop over to “Accessibility.”
- Pick “Visual effects,” and flip that “Transparency effects” switch.
Now, here’s the kicker: while Windows 11 lets you mess around with transparency, it’s kinda limited. You can’t tweak how see-through things get, like setting exact opacity levels. If you’re itching for more control, you might have to hit up third-party apps, but be warned—they can sometimes be a bit of a wild card when updates roll in.
In the end, transparency effects in Windows 11 are all about looking good while keeping you in charge of how things appear. It’s a pretty modern touch that mixes style with substance, giving your interface a dash of personality.
So, what’s the deal with Transparency Effects in Windows 11? Let’s dive in. These nifty visual upgrades give your desktop a semi-transparent, blurred vibe. You’ll notice it on things like the taskbar and Start menu. It’s all part of Microsoft’s Fluent Design makeover and definitely makes your screen look sharper and more up-to-date. But, here’s the catch—sometimes these effects can act up, vanish, or slam the brakes on your PC’s performance. Let’s break it down and see what’s behind it all, plus some handy fixes.
Why Transparency Effects Are Cool
-
First off, they’re all about that eye-catching look.
- Your UI elements blend smoothly with your desktop background—no more harsh lines cluttering your view.
- It’s like layering a classy veil over your apps with effects like acrylic materials.
- They groove nicely with features like Mica and Acrylic, adding blur or opaque vibes exactly where needed.
-
What do you need to run these cool effects?
- Your graphics need to be up to snuff—think DirectX 12 or later.
- If your system’s got the chops for Windows 11, you’re probably good to go.
-
How about performance?
- If you’re rocking an older device or want to save battery, you might want to think twice.
- No harm in switching it off if your laptop is running low on juice.
Dealing with Common Issues
Here’s what could be mucking things up and how you can set them straight:
Issue 1: Transparency Effects Have Vanished
- Oops, maybe you switched them off by mistake.
- Here’s how to switch them back on:
- Head to Settings, then Personalization, followed by Colors.
- Toggle the Transparency Effects switch to On.
- Give your PC a little restart for good measure.
Issue 2: Graphics Drivers Aren’t Cooperation
- Your driver might not be up to scratch with these effects.
- Let’s fix that:
- Press Win + X, go to Device Manager.
- Under Display adapters, right-click your GPU and pick Update Driver.
- Have it search automatically for drivers and install the latest ones.
- You could also grab them straight from your GPU maker’s site, like NVIDIA, AMD, or Intel.
Issue 3: Power-Saving Modes Throwing a Wrench in the Works
- Battery Saver or certain performance tweaks can mess with transparency.
- Here’s your ticket to a fix:
- Stop Battery Saver:
- Go into Settings, System, and then Power & Battery.
- Switch Battery Saver off.
- Tweak performance settings:
- Navigate to Settings, then System, Display, Graphics, Default Graphics Settings.
- Turning off Hardware-accelerated GPU scheduling, just temporarily, might help.
- Stop Battery Saver:
Issue 4: Group Policy or Registry Troubles
- Corporate setups or custom tweaks might throw a spanner in the works.
- Here’s what to do:
- Press Win + R, type gpedit.msc, and hit Enter.
- Go to Computer Configuration, Administrative Templates, System, Display.
- Make sure Turn off transparency is set to Not Configured or Disabled.
- For those comfortable with registry edits:
- Open Regedit and navigate to HKEY_CURRENT_USER\Software\Microsoft\Windows\DWM.
- Set EnableTransparency to 1, if possible.
Issue 5: System Files Are on the Fritz
- Damaged system files could be messing with your visual features.
- Here’s your rescue plan:
- Run System File Checker:
- Open Command Prompt as admin and run
sfc /scannow.
- Open Command Prompt as admin and run
- Use DISM to tidy up system images:
- In Command Prompt, run
DISM /Online /Cleanup-Image /RestoreHealth.
- In Command Prompt, run
- Run System File Checker:
Issue 6: Third-Party Software Has Meddled
- Apps such as custom themes or optimization tools may have gotten in the way.
- Try these troubleshooting steps:
- Disable startup apps for a bit via Task Manager.
- Consider giving recent customization software the boot.
Feeling Adventurous? Try Advanced Tips
For those wanting a bit more control:
- Adjust Transparency Intensity:
- Why not use something like Winaero Tweaker to play with blur levels?
- Disable Certain Effects:
- Some registry tweaks or tools like Ultimate Windows Tweaker can help you turn off Mica/Acrylic selectively.
Transparency effects in Windows 11 are all about striking a balance between looking good and running smooth. If things go sideways, usually it’s about drivers, settings, or some pesky software. You can always turn transparency off temporarily through the Colors menu if performance is key. Just make sure you’ve got a backup or a restore point handy when tinkering with registry or policy settings.
Alright, so what’s the deal with transparency effects in Windows 11, and how can you turn them on or off?
If you’ve been tinkering with your Windows 11, you might’ve noticed that some elements like the Start Menu and Taskbar have this cool translucent effect. It’s like giving your desktop a stylish upgrade, adding a bit of flair and depth that makes everything look more snazzy.
How to Flip Transparency Effects On or Off:
Straightforward Method: Use Settings
- Hit Win + I to pop open the Settings.
- Head over to Personalization > Colors.
- Slide the switch for Transparency effects to turn it on or off. Easy peasy.
Alternative Method: Accessibility Knack
- Open up Settings and go to Accessibility.
- Select Visual effects.
- Give the Transparency effects switch a flick to suit your preference.
Why It’s Cool:
- Looks Good: Let’s be honest, it just makes your interface look slick.
- User Experience Boost: It adds a bit of pizzazz, making interactions a tad more enjoyable.
What to Keep in Mind:
- Performance Quirk: If you’re on a slower machine, turning off transparency might help it run smoother and save some battery. No harm, no foul.
So there you have it! Whether you’re all about the swanky look or you just want to streamline your PC’s performance, tweaking transparency effects lets you do just that. Tailor it to fit how you roll on Windows 11.